How to make VRM file
Mon, Apr 16, 2018Conversion from existing 3D model

- Import the 3D model data and UniVRM into the current unity project. Adjust and set the size, material, etc.
- Export the 3D model data as VRM in Unity (normalization processing)
- Import the VRM file into the current unity project and customize the settings (license, spring bone, expression, eyelook, etc.)
- In some cases, make sure the model is working (e.g. facial expression change) in play mode first
- Export the 3D model data after the adjustment is finished. The new settings now are saved in the updated VRM file.
Briefly speaking, A 3D model can be adjusted and exported as VRM file in Unity. Once a VRM file is made, it can be imported again for model fine tuning.
1. Create an empty project in Unity
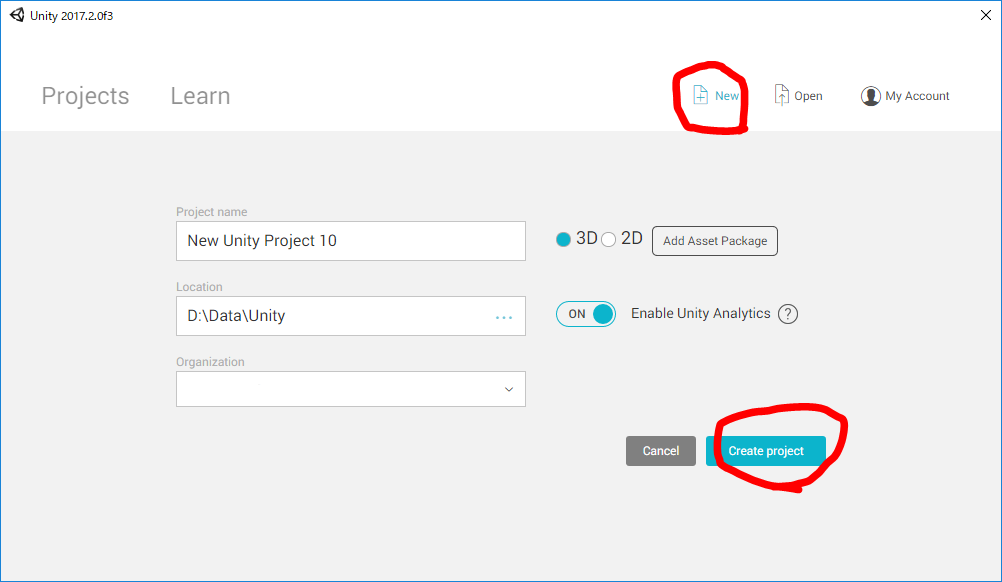
Create a new project at the start page (New -> Create project).
2. Import UniVRM package into the created project
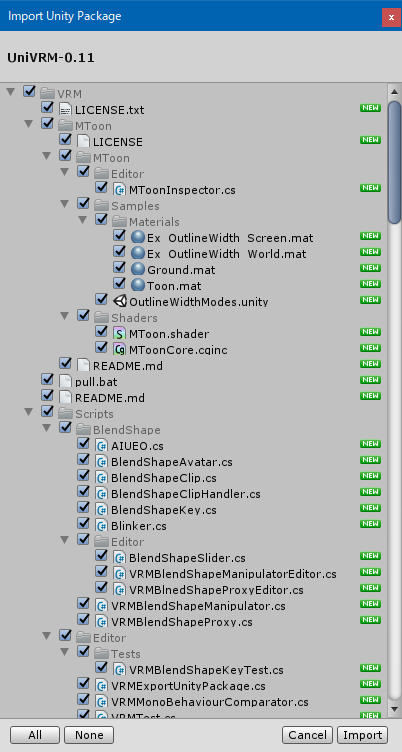
Download the latest unitypackage (UniVRM-0.XX) from UniVRM/releases and import it into the current project (Assets -> Import Package -> Custom Package). The path of imported files is../Assets/VRM. It is recommended to delete existing VRM folder included VRM in advance before package import.
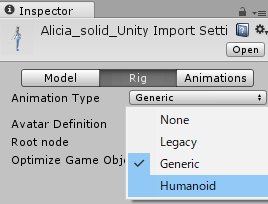
3. Prepare a 3D model that can be handled as “Humanoid” in Unity
Prepare a humanoid model that can be imported into Unity such as FBX format. The bone setting is also required. Also, be sure to use your own model or the licensed model data that is processed and used as VR avatar. As we will describe later, there are items that describe license information in VRM file itself, authors need to set those items for their own VRM models.
Go to the model’sImport Settings -> Rig -> Animation Typeand selectHumanoidafter the model is imported.
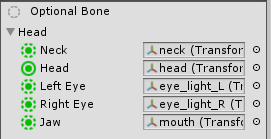
When the model file is imported, bone assignments done by auto-recognition may be different from expectations (see image above):
- Jaw is assigned to mouth
- Eye is assigned to eye highlight
We can fix them by assigning the right corresponding parts manually.
4. Adjust the model data and export it as VRM from menu(normalization processing)
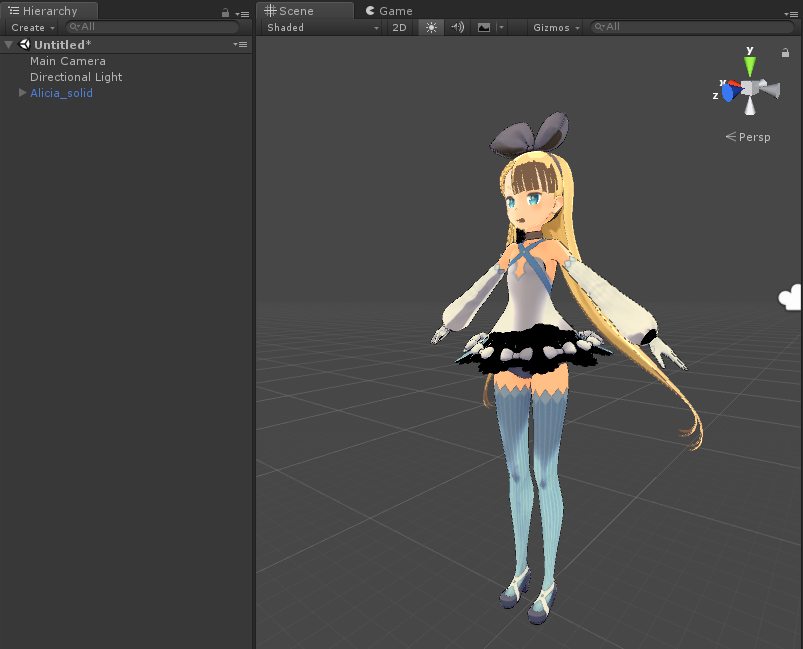
Drag and drop the model data (made in step 3) under the scene in the Hierarchy window and adjust the following parameters:
- Model Position
- The model should be placed at the origin
- Model Scale
- 1.0 = 1m
- Model Pose
- The model should face towards +Z(axis) direction
- Texture(material / shader)
- Go to
Import Settings -> Materials -> Locationand selectUse External Materials (Legacy)to enable shader option. It is highly recommended to use the shaders listed below:- PBR
- Standard shader (Unity standard)
- Unlit type shader
- VRM/UnlitTexture (same as Unit/Texture)
- VRM/UnlitCutout (same as Unit/Coutout)
- VRM/UnlitTransparent (same as Unit/Transparent)
- VRM/UnlitTransparentZWrite (Alpha blending and ZWrite are available. It is assumed to be applied to semi-transparent objects)
- Toon shader
- VRM/MToon (lighting supported toon shader)
- PBR
- Go to
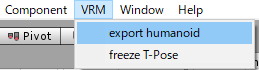
After the adjustment is finished, select the model data inHierarchyand export the model frommenu -> VRM -> export humanoid.
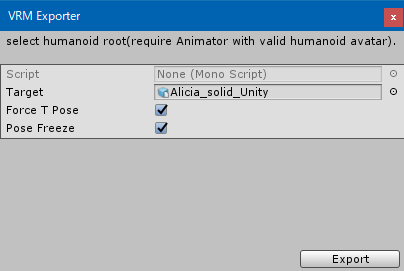
Check the boxes and click theExportbutton
- Force T Pose
- Force the model pose to become T-Pose before removing rotation / scale.
- Pose Freeze
- Whether the rotation / scale removal processing should be performed. It is the process of normalizing model for conforming to the VRM rules. Please make sure to check the boxes at the first time of use. After this process is done, all the components can work correctly.
By clicking theExportbutton, the VRM file can be created. To easily track this file, it is recommended to name the file like this: “Model_Name_Normalized.vrm”. Details about model’s T-Pose normalization can be found here.
5. Import the VRM file
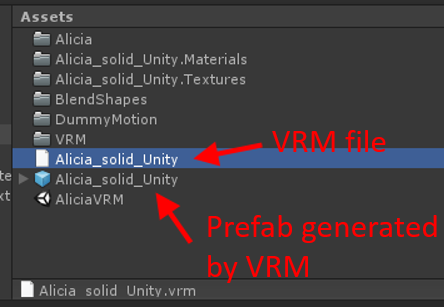
Drag and drop the VRM file (~.vrm) from step 4 into Assets folder. The prefab file of the imported VRM model data can be automatically generated.

Now remove the model data (step 4), and drag and drop the prefab file under the scene in the Hierarchy window. Normalized model data such as mesh, etc. can then be shown.
6. Custom setting in VRM
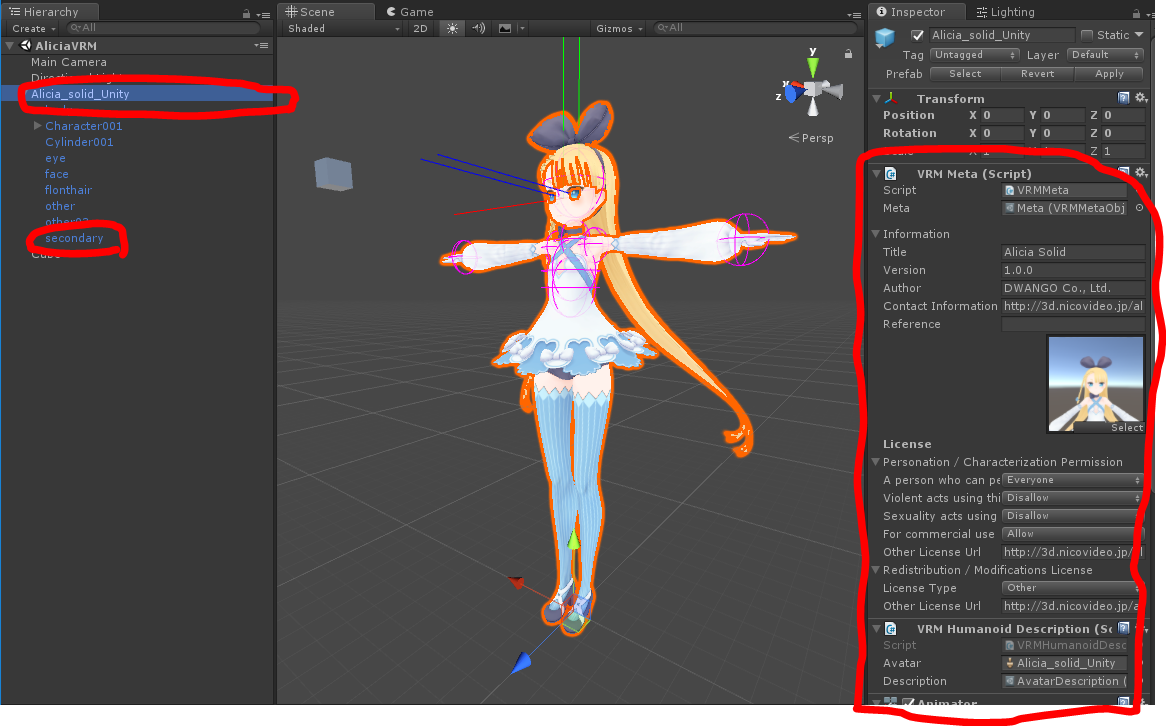
The VRM model’s information will be shown in the Inspector window once the GameObject of the model data (step 5) inHierarchyis selected. In addition, the setting about spring bone (object swaying) is available in “secondary”. Please at least fill in title, author, license information. Specially, license information is crucial!
-
Information
- Title
- Avatar model name (any input)
- Version
- Avatar model version (any input)
- Author
- Author name
- Contact Information
- Author contact information
- Reference
- Original / Related works of this avatar, if any
- Title
-
License
-
Personation / Characterization Permission
- A person who can perform with this avatar
- Only Author
- Explicitly Licensed Person
- Everyone
- Permission to perform violent acts with this avatar
- Disallow
- Allow
- Permission to perform sexual acts with this avatar
- Disallow
- Allow
- For commercial use
- Disallow
- Allow
- Other License Url
- If there are any conditions not mentioned above, put the URL link of the license document here
- A person who can perform with this avatar
-
License redistribution / modification
-
License Type
- Redistribution Prohibited
- Copyright wavier (CC0)
- Creative Commons CC BY License(CC_BY)
- Creative Commons CC BY NC License(CC_BY_NC)
- Creative Commons CC BY SA License(CC_BY_SA)
- Creative Commons CC BY NC SA License(CC_BY_NC_SA)
- Creative Commons CC BY ND License(CC_BY_ND)
- Creative Commons CC BY NC ND License(CC_BY_NC_ND)
- Other
-
Other License Url
- If “Other” is selected, put the URL link of the license document here
-
-
Besides, please set up necessary items listed below:
- Expression and lip-sync (BlendShape)
- First-person point of view (Get rid of model’s head for VR applications)
- Movable range for eye gaze/eyeball controlled by bone or BlendShape
- Spring bone (SpringBone/SpringBoneCollider)
7. Check model expressions/movements in play mode(If necessary)
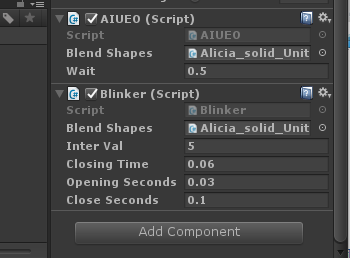
SetAnimationClip/AnimationControllerand set viewing target inVRMLookAtHead -> Target(the head orientation towards the target). Then, check model’s movements and expressions. Also, fairly simple test scripts “AIUEO” and “Blinker” are provided. ClickAdd Componentat the bottom of model’s Inspector window to add “AIUEO” script or drag the script directly to Inspector. After “AIUEO” is set, lip synchronization animation that “aa”, “ih”, “ou”, “E”, “oh” switches in turn can be created. Similarly, if “Blinker” is set, eye blink animation that plays periodically can be created. See runtime VRM loader sample (download UniVRM-RuntimeLoaderSample-0.XX) for more details on how to use these scripts.
8. Export the adjusted VRM model
After the adjustment is completed, select the model data inHierarchyand again export the model frommenu -> VRM -> export humanoid.
This time please uncheck “Force T Pose” and “Pose Freeze”. They are only used for the first time (normalization processing). Name the file and export the adjusted VRM model.
Done!
Your VRM file is good to go. Let’s try to import the VRM file into applications that support VRM!